1. Preparation
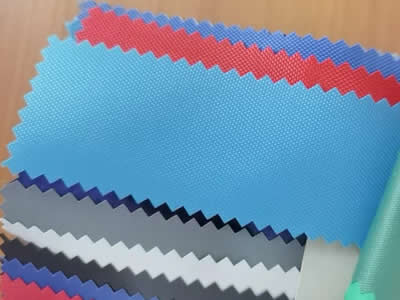
Material Check
Check that advertising tent parts—frame, fabric, connectors, ground pegs, guy ropes—are undamaged. Replace broken parts to avoid issues.
Site Prep
Choose a flat site without sharp objects, near busy areas for visibility. Avoid low, windy spots. Clear debris for safe setup.
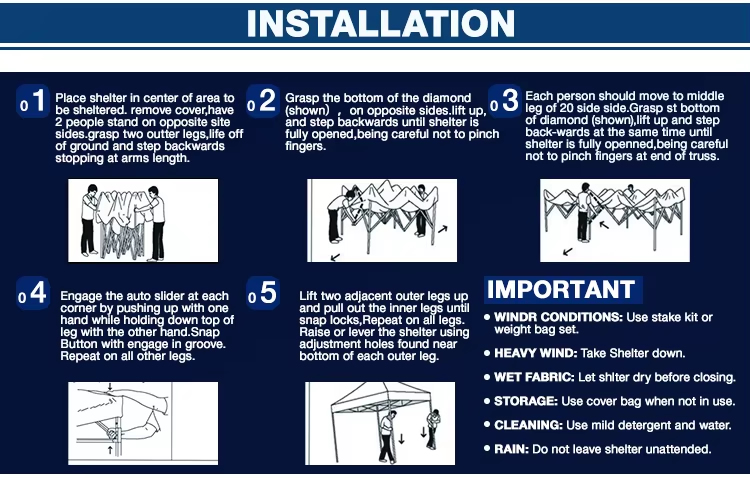
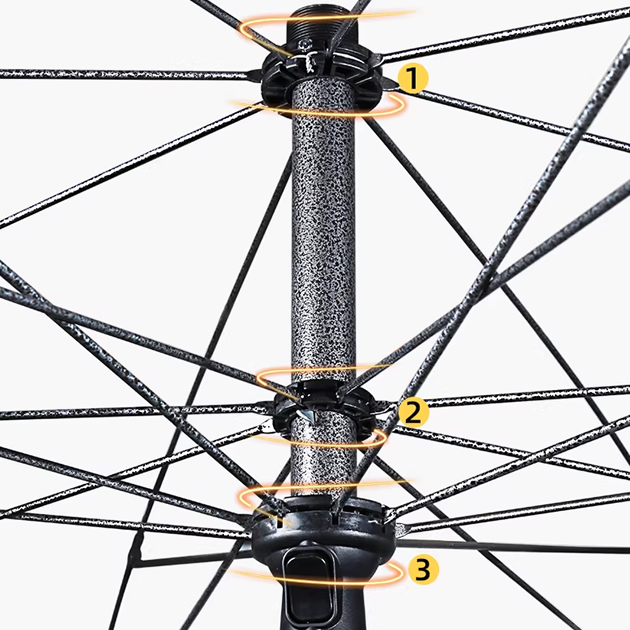
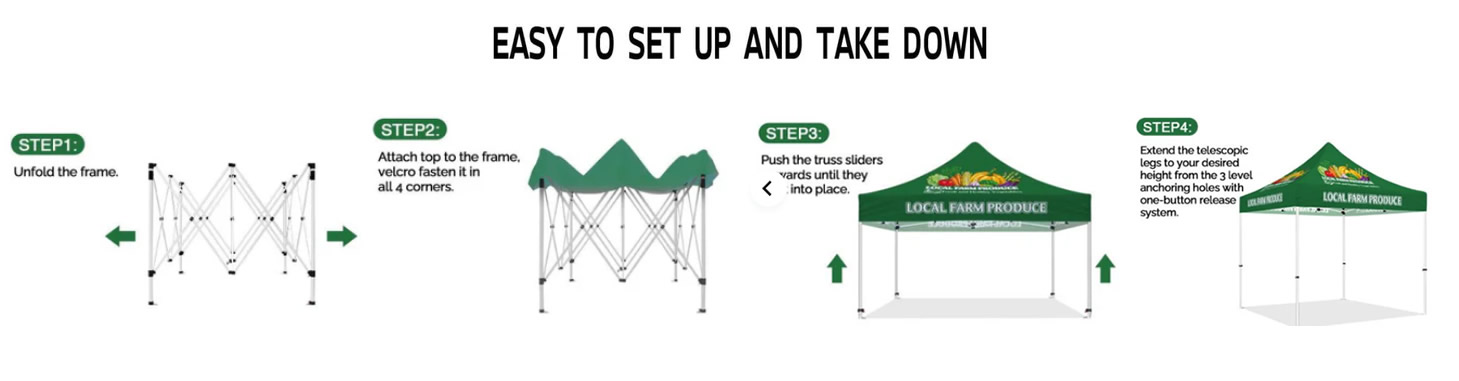
2. Frame Assembly
Take the advertising tent frame out of packaging and lay parts out. Extend collapsible poles (lock them) and connect with screws/clips as directed. Start with main poles and crossbars; make sure joints are tight. Get help for large tents.
3. Tent Fabric Installation
Lay fabric over the frame, lining up markings/logos to face the audience. Smooth folds, then secure: fasten corners first (important for tightness), then edges with Velcro, ropes, or clips. Pull gently to check; smooth wrinkles.
4. Stabilize the Tent
Adjust frame height (6–8 feet for easy interaction) and make sure it’s level. Use ground pegs: drive 6–8 inches deep at 45° around the tent, focusing on corners. For hard ground, use sandbags. Add guy ropes in wind.
5. Inspection & Finish
Shake the frame to check stability—retighten connections or add pegs if it wobbles. Check fabric (secure fasteners, no tears) and frame joints. Clean the site, then walk around to confirm logos are visible, it works well, and it’s safe. Your advertising tent is ready for audiences!