Get it set up in 4 minutes! Building an Camping canopy Tent
What's it like to own a self-supporting, cross-structure tent? Today, let's build the Camping canopy Tent Dream Tent together and experience its charm!
Step 1: Check the Accessories
The Dream Tent accessories include: 1 outer tent, 1 inner tent, 5 support poles, 2 porch poles, 25 ground pegs, and 10 guy lines. Whether setting up or packing up, carefully check the accessories to prevent losing small items.
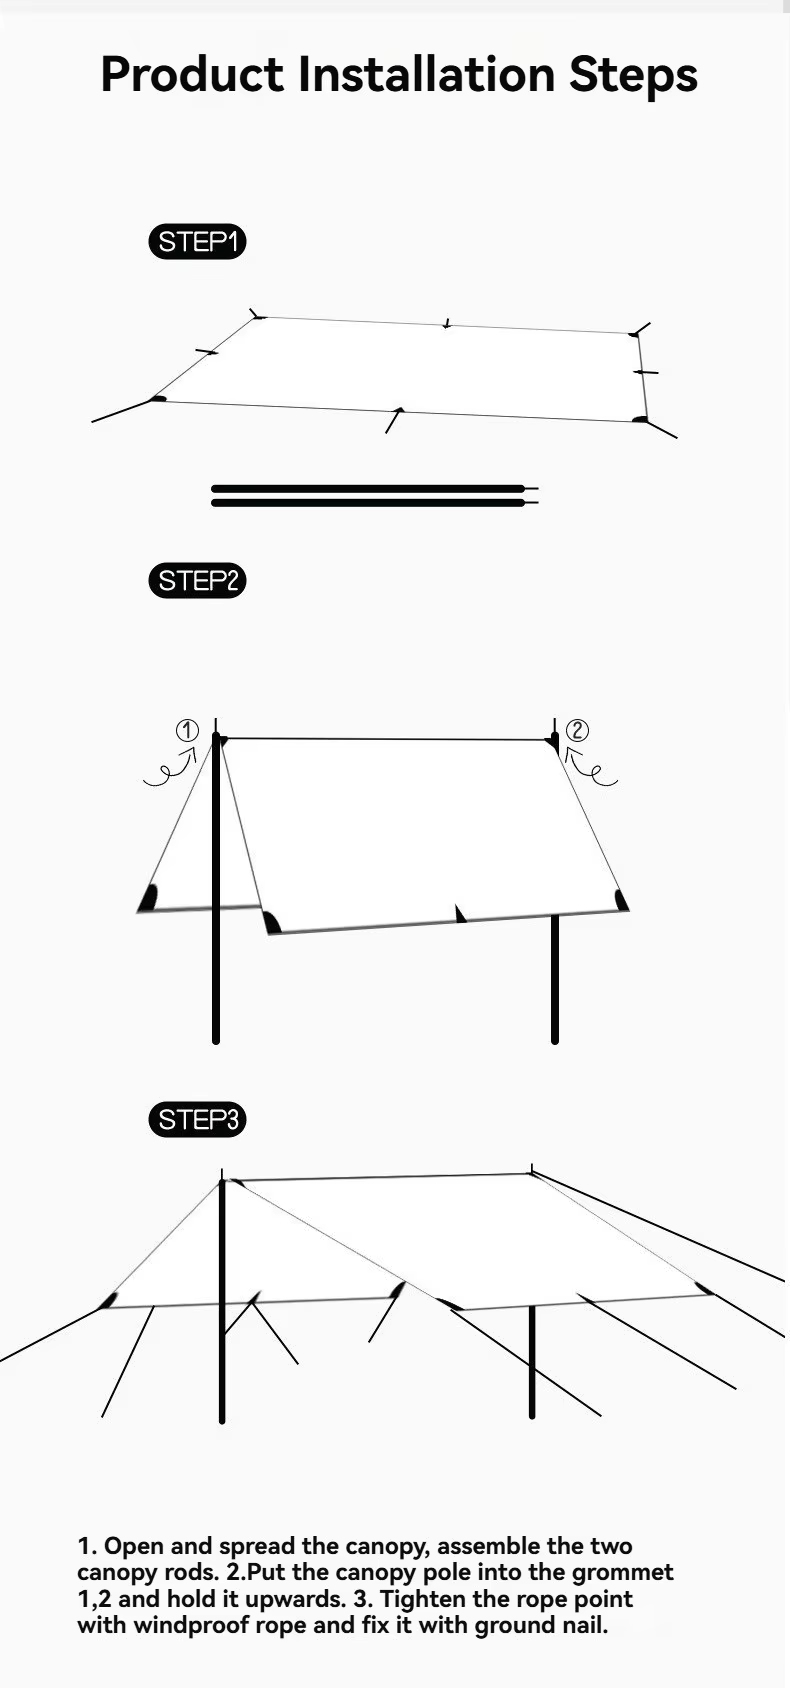
Step 2: Assemble the Outer Tent
The Dream Tent's identification system is very convenient: the pole colors correspond to the color codes on the openings. The specific steps are as follows:
1. Thread the 3 horizontal support poles into their corresponding sleeves.
2. Insert the ends of the support poles into the metal rings at the bottom corners of the tent to secure it.
3. Do the same for the side support poles, threading them into the sleeves and inserting them into the metal rings, then fasten them with G-hooks.
Finally, secure the guy lines with ground pegs.
Step 3: Assemble the Abutment
Secure the apron poles inside the front tent flap.
Tighten the guy lines and secure with tent pegs.
My favorite part is the [front tent flap design]! It easily extends the shaded area! Connect the front tent flap to the front tent flap with the zipper, tighten the guy lines, and secure with tent pegs—you'll have a fantastic front tent flap!
After assembling the inner tent, your tent is set up! Give it a try!